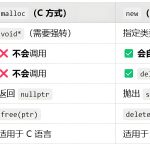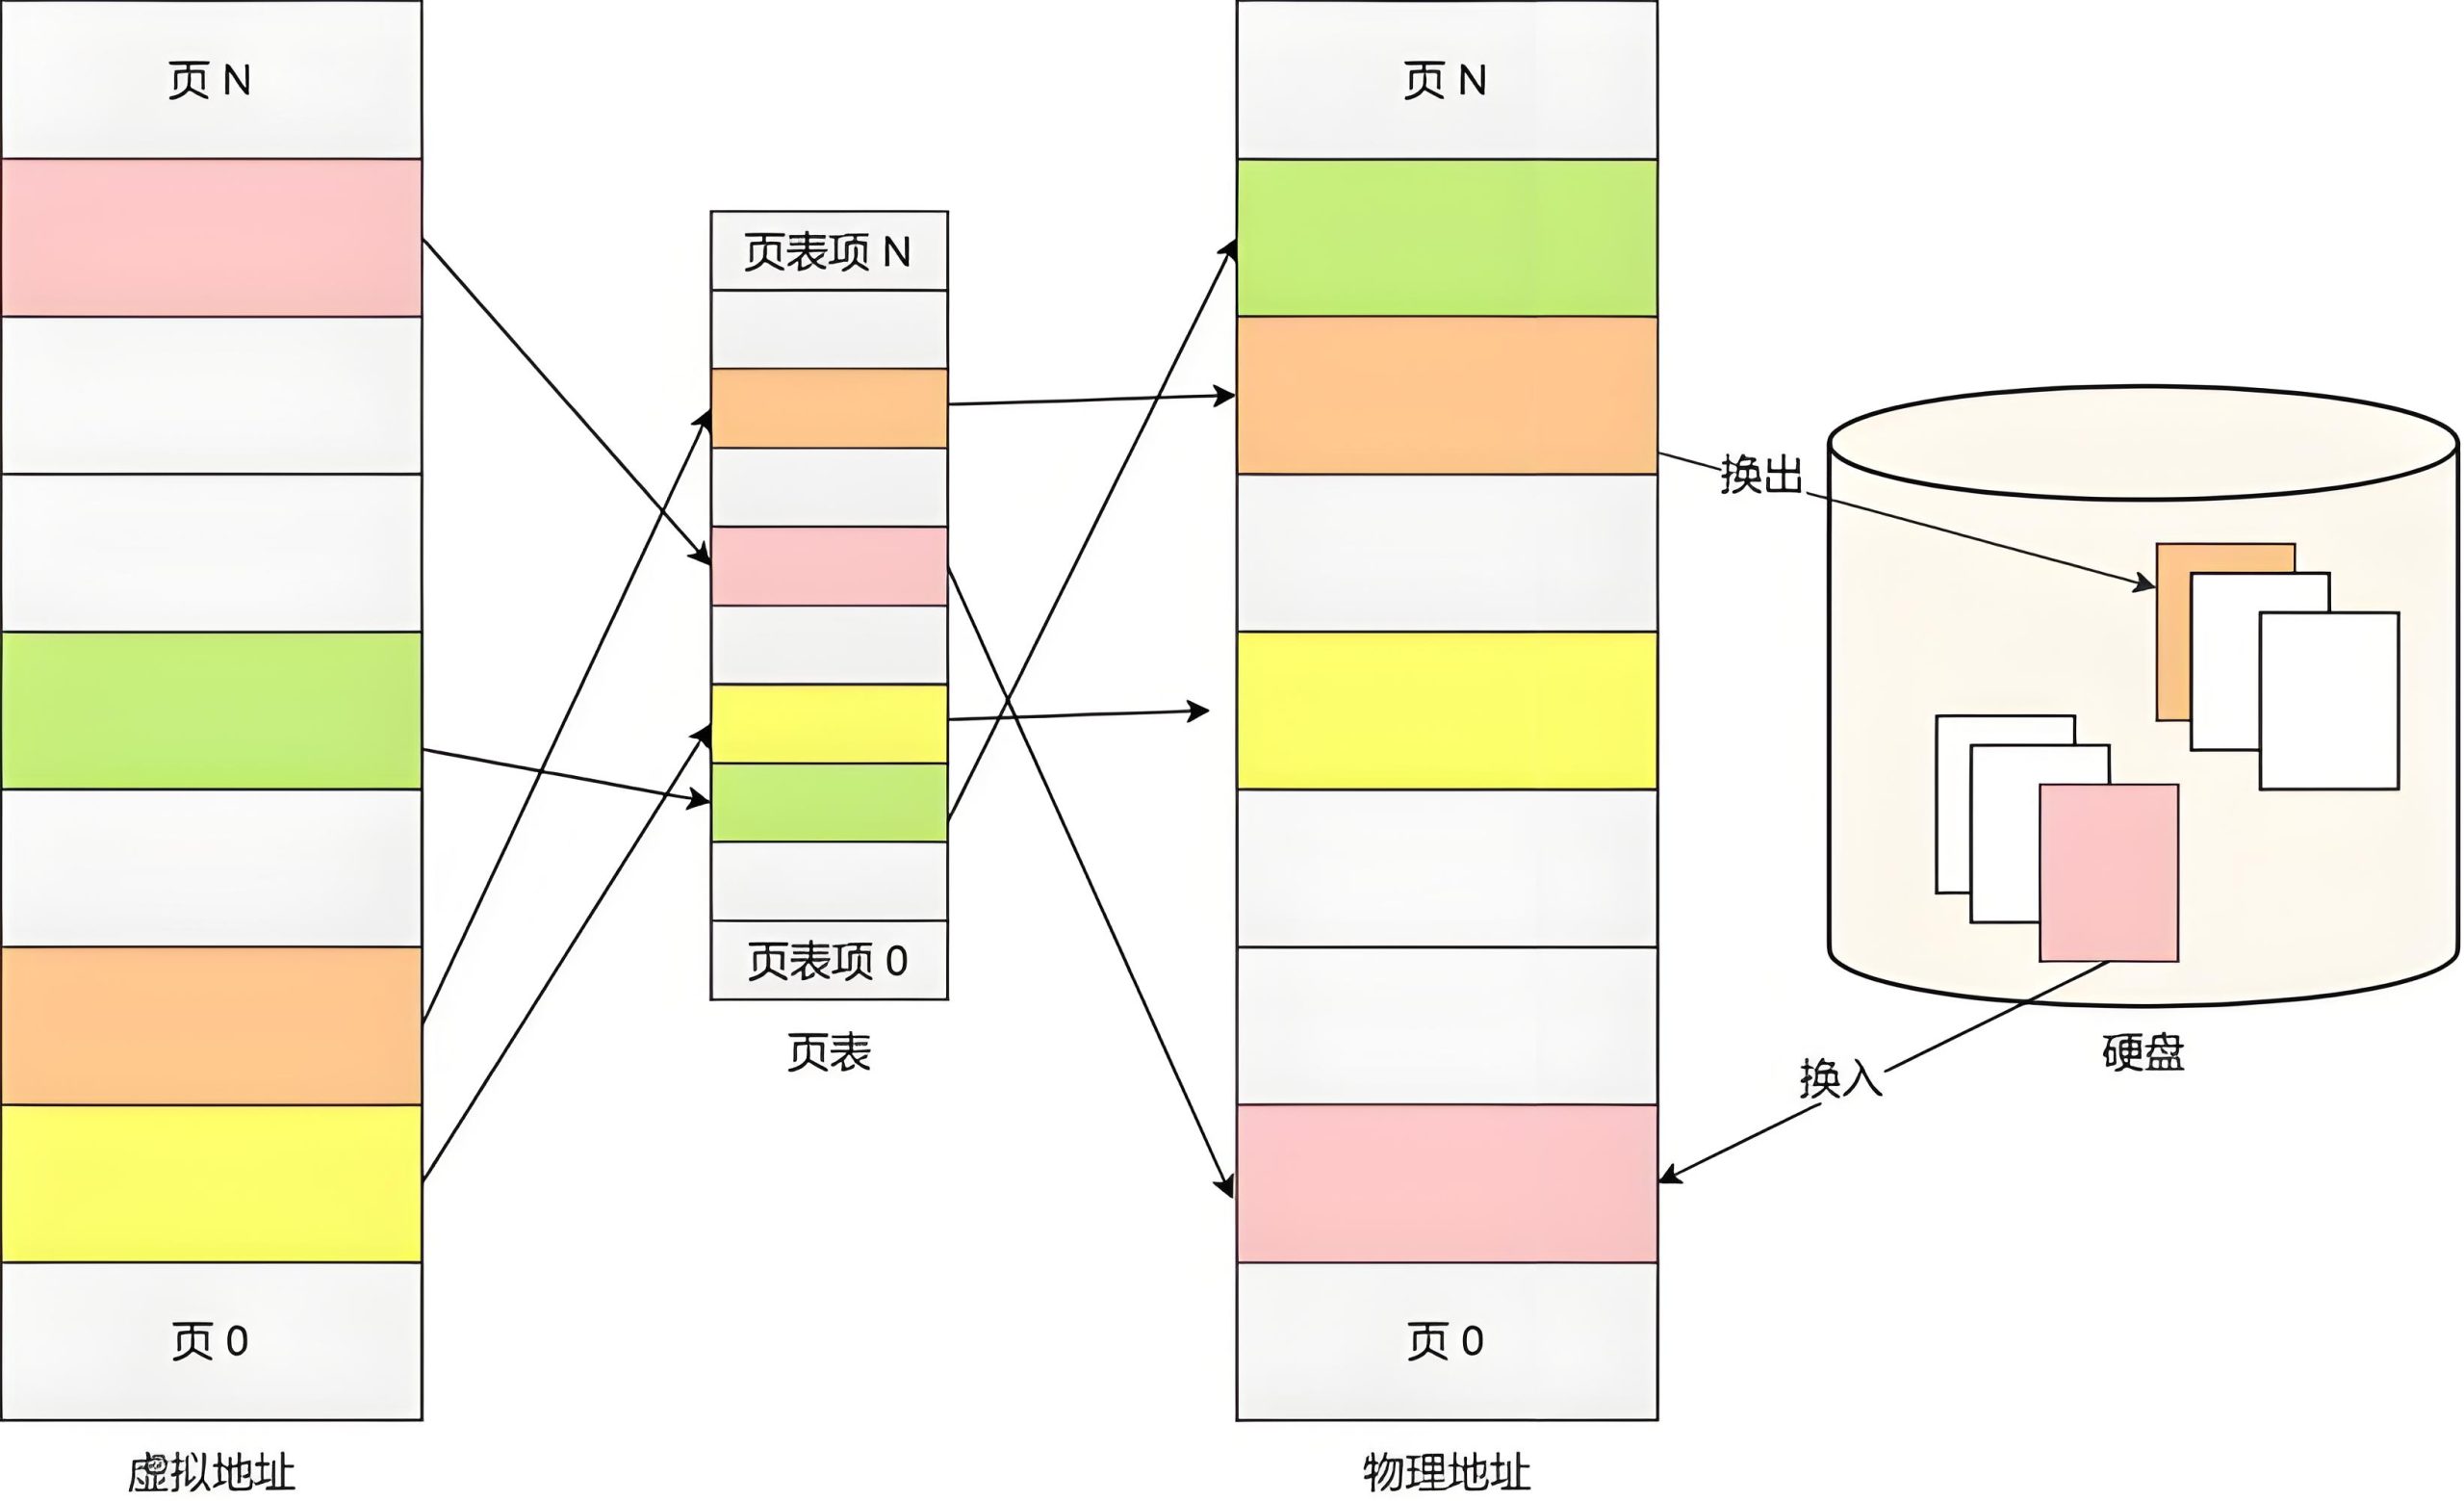
Introduction to Virtual Memory
In operating systems, all running programs must first be received by the memory and then processed by the CPU. However, when executing programs occupy a large amount of memory, it may lead to the exhaustion of memory resources. To address this issue, the Windows operating system has introduced virtual memory technology. Essentially, this technology virtualizes a portion of the hard disk space for use as memory. Although the read/write speed of the hard disk is much slower than that of the memory module, it can effectively prevent system crashes caused by memory exhaustion. Especially when running large software or memory-intensive programs, we often encounter situations where virtual memory is insufficient.
Functions of Virtual Memory
Virtual memory technology in operating systems solves the problem of insufficient memory resources by using a portion of the hard disk as extended memory, especially when running large programs. This technology helps users improve system availability, particularly in cases where memory resources are tight.
Virtual memory usage can prevent system crashes due to memory exhaustion, and it enhances system stability especially when handling memory-intensive tasks. When physical memory is insufficient, virtual memory provides an effective solution, thus ensuring the smooth operation of the system.
02 Steps to Set Virtual Memory
System Properties Window
Right-click on the “My Computer” icon and select “Properties” to open the System Properties window.
Advanced Tab
Find and click the “Advanced” tab, then select the “Performance” settings button.
After opening the Performance settings, select the “Advanced” tab again, and then find and click the “Change” button for “Virtual Memory” below. In the System Properties window, select the “Advanced” tab to find the “Performance” settings.
Virtual Memory Change Options
In the pop-up virtual memory settings window, you can see that the system defaults to setting virtual memory on the system drive (usually the C: drive). To change the settings, first select the C: drive, then choose “No paging file”, and click the “Set” button to clear the virtual memory settings on the system drive.
In the Performance settings, select the “Advanced” tab to find the “Change” button for virtual memory to adjust the settings.
Select Drive and Set Size
After clearing the virtual memory on the system drive, you need to set it to another drive. In the virtual memory settings window, select the drive to be set (e.g., D: drive) and choose the “Custom size” option. Enter an appropriate value in the “Initial size” text box, which is usually equivalent to the size of your physical memory, such as 2048MB. The maximum size is recommended to be 1.5 to 2 times the initial size.
Virtual memory can be set on a non-system drive. After selecting the drive, set the initial size to be equivalent to the physical memory, and the maximum size is recommended to be 1.5 to 2 times that.
After completing the above steps, you have successfully set the virtual memory to another drive and allocated an appropriate memory size for it.
Confirm Settings
After completing the settings, click the “OK” button in sequence to exit the virtual memory settings window and return to the System Properties window. After finishing the virtual memory settings, follow the steps to confirm and exit the settings window to save the changes.